

I’ll be honest — I didn’t plan to fall in love with nutella vanilla cheesecake cups the first time I made them. It was one of those “let’s throw something together for a dinner party” moments. But from the very first creamy, chocolate-swirled bite, I knew I had created something special. They’re rich without being heavy, elegant enough for a dinner table yet easy enough for a lazy Sunday afternoon. And the best part? You can make them baked or no-bake, depending on your mood and schedule.
In this post, I’ll walk you through exactly how to make these irresistible cheesecake cups from scratch, share tips I’ve learned over countless batches, and even answer some of the most common questions bakers ask about them.
What Makes Nutella Vanilla Cheesecake Cups So Special?
There’s cheesecake, and then there’s this. What sets these cheesecake cups apart is the balance of flavors and textures. The smooth vanilla base creates a creamy, light foundation, while the rich Nutella swirl adds depth, chocolatey sweetness, and a hint of hazelnut that lingers after each bite.
Because they’re made in individual cups or jars, they’re also incredibly versatile. Serve them at dinner parties, pack them for picnics, or keep a few in the fridge for midnight cravings. The mini size also makes portion control a breeze — though I’ll admit, stopping at one isn’t easy.

Ingredients You’ll Need
Before you start, gather everything you need. Most of these are pantry staples, which is why this dessert is as convenient as it is delicious.
For the crust:
- 1 cup graham cracker crumbs
- 3 tbsp melted butter
- 1 tbsp granulated sugar
For the vanilla cheesecake layer:
- 8 oz (1 block) cream cheese, softened
- 1/3 cup granulated sugar
- 1 tsp pure vanilla extract
- 1/2 cup heavy whipping cream
For the Nutella swirl:
- 1/3 cup Nutella, slightly warmed
- 1 tbsp heavy cream (optional, for smoother consistency)
Optional toppings: Whipped cream, crushed hazelnuts, chocolate shavings
How to Make Nutella Vanilla Cheesecake Cups (Baked Version)
If you prefer a classic, slightly denser texture, the baked version is the way to go.
Step 1: Make the Crust
Mix the graham cracker crumbs, sugar, and melted butter in a bowl until the texture resembles wet sand. Press about 2 tablespoons of the mixture into the bottom of each cupcake liner or small glass cup. Bake at 325°F (160°C) for 5–6 minutes, then let cool completely.
Step 2: Prepare the Vanilla Cheesecake Filling
Beat the softened cream cheese and sugar together until smooth and fluffy. Add the vanilla extract and heavy cream and continue beating until the mixture is creamy and light. Spoon this filling evenly over the cooled crusts.
Step 3: Add the Nutella Swirl
Gently warm the Nutella so it’s easier to drizzle. Spoon a small amount on top of each cup and use a toothpick or skewer to swirl it into the cheesecake. This creates that signature marbled look and blends the flavors beautifully.
Step 4: Bake and Chill
Bake the filled cups at 325°F (160°C) for 15–18 minutes, or until the centers are just set. Allow them to cool at room temperature, then chill for at least 3 hours before serving.
How to Make a No-Bake Version (Perfect for Busy Days)
Sometimes you just don’t want to turn on the oven — and that’s where the no-bake version shines. It’s lighter, quicker, and just as delicious.
- Crust: Mix the same crust ingredients but skip the baking step. Press the crumbs firmly into the cups and refrigerate them for 10–15 minutes to set.
- Filling: Follow the same cheesecake filling recipe. Because there’s no baking, be sure to beat the mixture until it’s smooth and airy.
- Assembly: Add the Nutella swirl just as you would for the baked version.
- Chill: Refrigerate for at least 4 hours or overnight for best texture.
The result? A silky, mousse-like cheesecake cup that’s perfect for warm days or last-minute desserts.
Pro Tips for Perfect Cheesecake Cups Every Time
- Room-temperature ingredients are essential. Cold cream cheese won’t blend smoothly and can leave lumps.
- Don’t overbake. If you’re using the baked method, pull them out when the centers still jiggle slightly — they’ll firm up as they cool.
- Customize your crust. Try Oreo crumbs for extra chocolate flavor or digestive biscuits for a milder base.
- Add texture. A sprinkle of crushed hazelnuts or chocolate chips on top adds a delightful crunch.
Serving and Storage Suggestions
Serve these cheesecake cups chilled, ideally topped with a dollop of whipped cream and a drizzle of extra Nutella. They’ll stay fresh for up to 4 days in the refrigerator if covered tightly. You can also freeze them for up to 2 months — just thaw overnight in the fridge before serving.
Frequently Asked Questions
1. Can I make these cheesecake cups ahead of time?
Yes! They’re actually better when made a day ahead because chilling helps the flavors develop. Just store them covered in the fridge and add toppings right before serving.
2. Can I use low-fat cream cheese or a dairy-free alternative?
You can, but the texture and flavor will change slightly. Full-fat cream cheese gives the creamiest results, while dairy-free versions may be softer and lighter.
3. How do I make sure my no-bake version sets properly?
The key is beating the mixture thoroughly to incorporate air and refrigerating it for at least 4 hours. Overnight chilling gives the best texture.
4. Can I make these without Nutella?
Absolutely. You can swap Nutella with any chocolate-hazelnut spread or even peanut butter for a fun twist. Just keep the swirl method the same.
Sweet Endings: Why These Cheesecake Cups Deserve a Spot in Your Recipe Book
There’s a reason nutella vanilla cheesecake cups have become one of my go-to desserts — they’re proof that simple ingredients can create something extraordinary. The contrast between the smooth vanilla base and the rich, hazelnut-infused swirl makes every spoonful feel decadent yet comforting. And the fact that you can choose between a classic baked version and a quick no-bake alternative means this recipe fits any schedule, any mood, and any occasion.
If you’re looking for a dessert that always impresses, that’s endlessly customizable, and that disappears from the table faster than you can make a second batch, these cheesecake cups are it. Pair them with a hot espresso, drizzle them with caramel, or even layer them with Nutella vanilla cheesecake cups parfait style — however you serve them, they’re bound to become a favorite in your kitchen too.
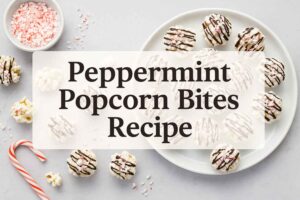
And if you love easy, crowd-pleasing desserts like this one, you should definitely try making white chocolate peppermint popcorn bites next. They’re just as fun and festive, and they complement these cheesecake cups beautifully when served together — perfect for holiday parties, cozy movie nights, or anytime you want a sweet treat duo that everyone will remember.